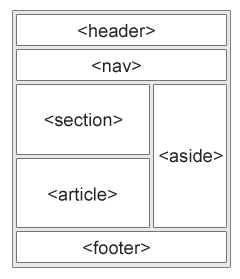
1. HTML5 Semantic Elements
HTML5는 웹 페이지의 다른 부분을 정의하는 새롭게 추가된 semantic elements(의미 요소)를 제공합니다.
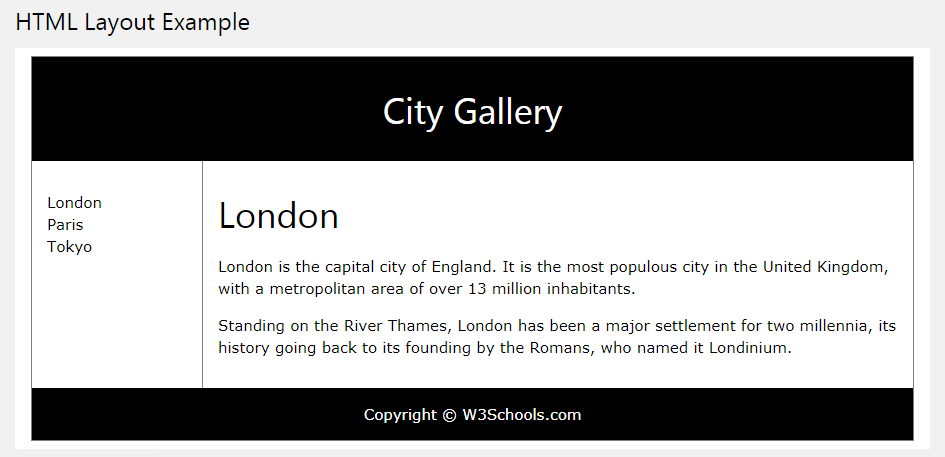
시맨틱 태그를 사용한 웹페이지의 예
<!DOCTYPE html>
<html>
<head>
</head>
<body>
<header>
<h1>City Gallery</h1>
</header>
<nav>
<ul>
<li><a href="#">London</a></li>
<li><a href="#">Paris</a></li>
<li><a href="#">Tokyo</a></li>
</ul>
</nav>
<article>
<h1>London</h1>
<p>London is the capital city of England. It is the most populous city in the United Kingdom, with a
metropolitan area of over 13 million inhabitants.</p>
<p>Standing on the River Thames, London has been a major settlement for two millennia, its history going back
to its founding by the Romans, who named it Londinium.</p>
</article>
<footer>Copyright © W3Schools.com</footer>
</body>
</html>
웹페이지를 파일로 만들어서 저장하고 브라우저를 통하여 열어보자.
다음의 스타일 태그를 추가하여 보자. 저장하고 브라우저를 통하여 열어보자.
<head>
<style>
header, footer {
padding: 1em;
color: white;
background-color: black;
clear: left;
text-align: center;
border: 1px solid red;
}
nav {
float: left;
max-width: 160px;
margin: 0;
padding: 1em;
}
nav ul {
list-style-type: none;
padding: 0;
}
nav ul a {
text-decoration: none;
}
article {
margin-left: 170px;
border-left: 1px solid gray;
padding: 1em;
overflow: hidden;
}
</style>
</head>
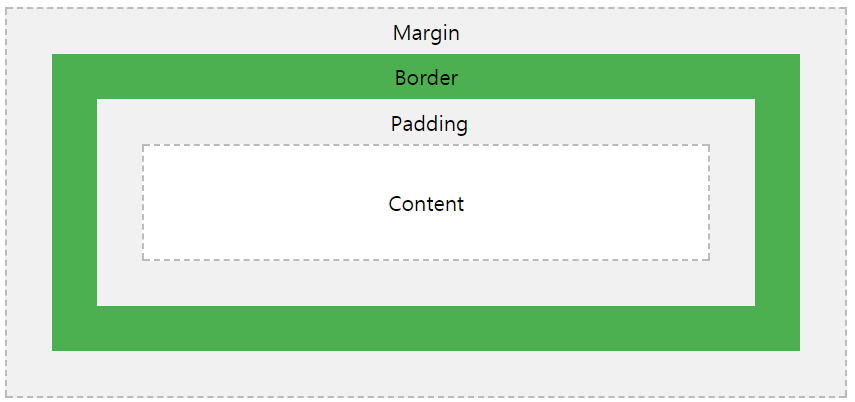
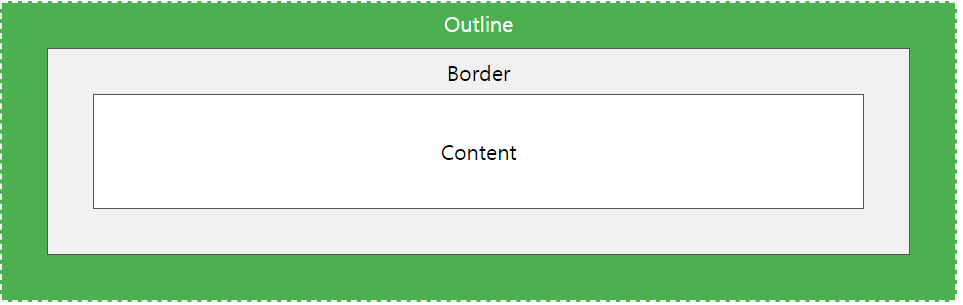
모든 HTML 엘레먼트는 박스(상자)로 간주 할 수 있습니다.
CSS에서는 디자인과 레이아웃에 대해 "박스 모델"이라는 용어를 사용합니다.
CSS 상자 모델은 본질적으로 모든 HTML 요소를 감싸는 상자입니다.
여백, 테두리, 패딩 및 실제 내용으로 구성됩니다. 아래 이미지는 상자 모델을 보여줍니다.
다음의 HTML을 작성하여 보자.
<!DOCTYPE html>
<html>
<head>
<style>
div {
width: 320px;
padding: 10px;
border: 5px solid gray;
margin: 0;
}
</style>
</head>
<body>
<h2>Calculate the total width:</h2>
<img src="fig04.png" width="350" height="263" alt="해운대">
<div>The picture above is 350px wide. The total width of this element is also 350px.</div>
</body>
</html>

요소의 전체 너비는 다음과 같이 계산되어야합니다.
총 요소 너비 = 너비 + 왼쪽 패딩 + 오른쪽 패딩 + 왼쪽 테두리 + 오른쪽 테두리 + 왼쪽 여백 + 오른쪽 여백
Outline은 borders와는 다르며 element의 크기에 계산되지 않는다.
즉 element의 전체 너비와 높이는 외곽선의 너비에는 영향을받지 않습니다.
다른 엘레멘트와 영역이 겹쳐질 수 있다.
CSS에는 다음과 같은 속성이 있습니다.
모든 HTML element는 유형에 따라 기본 display 값을가집니다.
대부분의 element에 대한 기본 display 값은 block 또는 inline입니다.
element에 대한 기본 display 값을 none으로 설정하면 element가 보이질 않습니다.
항상 새 줄에서 시작하고 새줄 끝납니다.

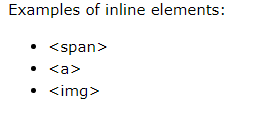
inline Elements
줄을 바꾸지 않고 계속 같은 줄에서 표시됩니다.
<!DOCTYPE html>
<html>
<head>
</head>
<body>
<div>
<h2>Calculate the total width:</h2>
<h1>Calculate the total width:</h1>
<p> The picture above is 350px wide. The total width of this element is also 350px.</p>
<img src="fig04.png" width="350" height="263" alt="해운대">
<img src="fig04.png" width="350" height="263" alt="해운대">
<img src="fig04.png" width="350" height="263" alt="해운대">
<img src="fig04.png" width="350" height="263" alt="해운대">
</div>
</body>
</html>
기본으로 설정된 display 값은 css 또는 자바스크립트에서 변경할 수 있다.
<style>
img {
display: block;
}
</style>
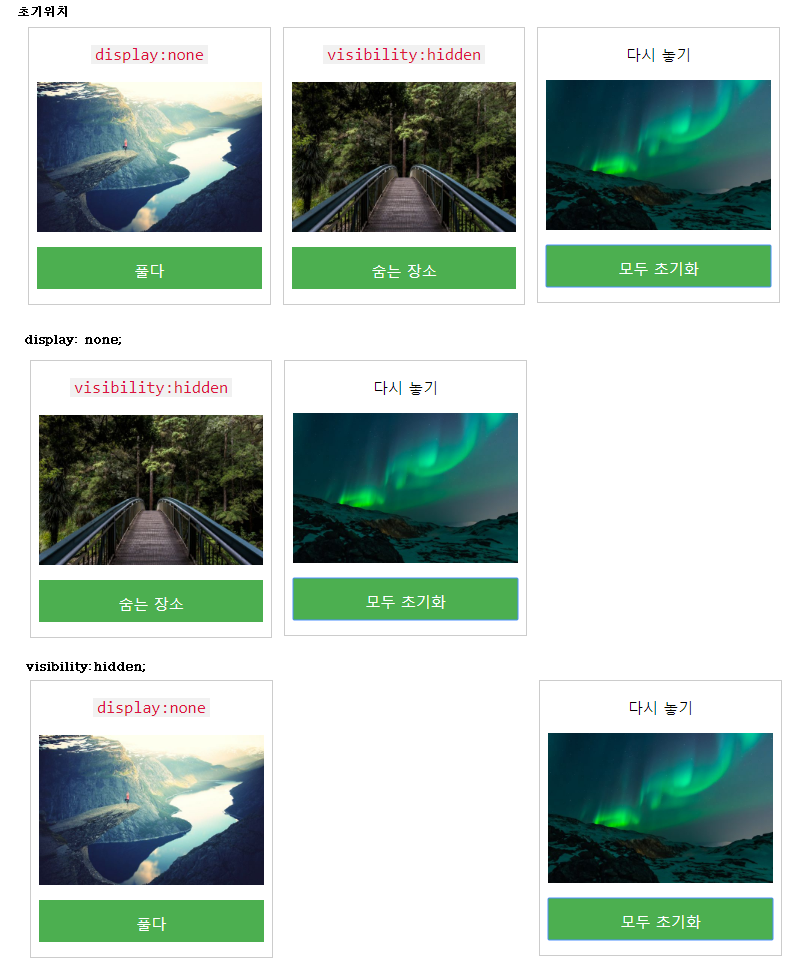
display:none or visibility:hidden?의 차이점
visibility:hidden 역시 element를 안보이게 만드는 css 속성이다.
차이점은 안보이지만 원래 차지하고 있던 공간은 그대로 유지된다.
<style>
img {
display: none;
}
</style>
<style>
img {
visibility:hidden;
}
</style>