Django Project01 ( Part I )
tutorial ( https://docs.djangoproject.com/en/5.0/intro/tutorial01/ )
1. 프로젝트 만들기
> python -m venv myenv <- 파이썬 가상환경만들기
> myenv\Scripts\activate <-- 가상환경 실행하기 ( 리눅스에서는 > source myenv/bin/activate )
(myenv) pip install django==4.0 <-- 장고설치하기
(myenv) python -m django --version
장고 프로젝트 만들기
(myenv) python -m django startproject myproject 또는 > django-admin startproject myproject
(myenv) cd myproject
(myenv) python manage.py runserver
2. MariaDB 설정하기
MariaDb를 설치한다. 데이터베이스를 만들고 사용자 계정을 만든다.
> mysql -u root -p
CREATE DATABASE s203010111;
CREATE USER 's203010111'@'localhost' IDENTIFIED BY 'pwd1234';
GRANT ALL PRIVILEGES ON s203010111.* TO 's203010111'@'localhost';
FLUSH PRIVILEGES;
로그아웃을 하고 s203010111 사용자로 로그인 하여 본다. 정상적으로 로그인이 되는지 확인한다.
로그인을하고 DB를 선택하고 테이블을 만든다.
> mysql -u s203010111 -p
테이블을 연습 삼아 만들어 본다. [참고] Django에서 models.py 파일을 만들으면 자동으로 테이블을 만들어 줌으로 이렇게 직접 만들 필요는 없다.
CREATE TABLE Question (
id INT AUTO_INCREMENT PRIMARY KEY,
question_text VARCHAR(200) NOT NULL,
pub_date DATETIME NOT NULL
);
CREATE TABLE Choice (
id INT AUTO_INCREMENT PRIMARY KEY,
question_id INT NOT NULL,
choice_text VARCHAR(200) NOT NULL,
votes INT NOT NULL DEFAULT 0,
FOREIGN KEY (question_id) REFERENCES Question(id) ON DELETE CASCADE
);
작성한 테이블에 데이터를 직접 입력해 본다.
INSERT INTO Question (question_text, pub_date) VALUES ("점심 메뉴는?", NOW());
INSERT INTO Question (question_text, pub_date) VALUES ("저녁 메뉴는?", NOW());
SELECT * FROM Question;
INSERT INTO Choice (question_id, choice_text, votes) VALUES (1, '짜장', 0);
INSERT INTO Choice (question_id, choice_text, votes) VALUES (1, '짬뽕', 0);
INSERT INTO Choice (question_id, choice_text, votes) VALUES (1, '탕수육', 0);
INSERT INTO Choice (question_id, choice_text, votes) VALUES (2, '삼겹살', 0);
INSERT INTO Choice (question_id, choice_text, votes) VALUES (2, '감자탕', 0);
INSERT INTO Choice (question_id, choice_text, votes) VALUES (2, '돈까스', 0);
3. polls App 만들기 (프로젝트에 추가하기)
[설문조사의 예] 투표를 하고 결과를 알 수 있도록 하여본다.
(질문) 점심 뭐 먹을 까요? (선택) 짜장 짬뽕 탕수육
(질문) 저녁 뭐 먹을 까요? (선택) 감자탕 삼겹살 돈까스
manage.py 폴더 있는 위치에서 작업을 한다.
프로젝트에 앱을 만든다.
(myenv) python manage.py startapp polls <-- pols 폴더 생성된다.

2. View 작성하기 Visual Code에서 열어본다.
첫 번째 뷰를 작성해 보겠습니다. 파일을 열고 polls/views.py 파일에 다음 Python 코드를 넣으세요.
from django.shortcuts import render
# Create your views here.
from django.http import HttpResponse
def index(request):
return HttpResponse("Hello, world. You're at the polls index.")
앱 에 대한 URLconf를 정의하려면 다음 내용이 담긴 polls파일을 만드세요. polls/urls.py
http://localhost:8000/polls 를 위한 설정
from django.urls import path
from . import views
urlpatterns = [
path("", views.index, name="index"),
]
프로젝트에서 글로벌 URLconf를 구성하여 myproject에 정의된 URLconf를 포함하는 것입니다
요청이 오면 이곳에서 router 라우터 기능을 제일 먼저 합니다.
myproject/urls.py에 다음과 같이 입력한다. http://localhost:8000/polls http://localhost:8000/admin
from django.contrib import admin
from django.urls import include, path
urlpatterns = [
path("polls/", include("polls.urls")),
path("admin/", admin.site.urls),
]
myproject/settings.py에 다음을 추가한다. polls를 추가한다. 프로젝트에 앱(polls)을 등록한다.
INSTALLED_APPS = [
'django.contrib.admin',
'django.contrib.auth',
'django.contrib.contenttypes',
'django.contrib.sessions',
'django.contrib.messages',
'django.contrib.staticfiles',
'polls',
]
3. 데이터베이스 설정
(1) myproject/settings.py
DATABASES = {
'default': {
'ENGINE': 'django.db.backends.mysql', # MariaDB는 MySQL 백엔드를 사용
'NAME': 's203010111', # 데이터베이스 이름
'USER': 's203010111', # MariaDB 사용자 이름
'PASSWORD': 'pwd1234', # MariaDB 비밀번호
'HOST': 'localhost', # MariaDB 서버 주소 (원격일 경우 변경)
'PORT': '3306', # MariaDB 기본 포트
'OPTIONS': {
'charset': 'utf8mb4', # UTF-8을 위한 설정
'init_command': "SET sql_mode='STRICT_TRANS_TABLES'" # Strict mode 설정 (권장)
},
}
}
(2) polls/models.py
polls/models.py 에 다음과 같이 입력한다. DB 테이블에 대한 정의이다.
from django.db import models
from django.utils import timezone
import datetime
class Question(models.Model):
question_text = models.CharField(max_length=200)
pub_date = models.DateTimeField("date published")
def __str__(self):
return self.question_text
# custom method만들기
def was_published_recently(self):
return self.pub_date >= timezone.now() - datetime.timedelta(days=1)
class Choice(models.Model):
question = models.ForeignKey(Question, on_delete=models.CASCADE)
choice_text = models.CharField(max_length=200)
votes = models.IntegerField(default=0)
def __str__(self):
return self.choice_text
다음 명령어를 입력하여 migrations 반영하도록 한다. 이 명령은 다음과 같은 상황에서 실행할 수 있다.
- 새로운 앱을 추가하고 새로운 모델을 정의한 후, 해당 모델의 DB테이블을 생성할 때.
- 기존 모델에 필드를 추가하거나 변경한 후, 이러한 변경사항을 데이터베이스에 반영할 때.
- 기존 데이터베이스를 새로운 환경(예: 개발에서 프로덕션)으로 옮길 때.
(myenv) pip install mysqlclient
(myenv) python manage.py makemigrations polls <-- polls/models.py에 정의된 모델(Choice, Question 등)을 기반으로 마이그레이션 파일을 생성
(myenv) python manage.py migrate <-- 데이터베이스에 적용한다.
(myenv) python manage.py runserver
웹브라우저로 접속하여 보자.
http://localhost:8000/polls/

4. Django Admin 사용하기
관리 사이트를 생성하는 일은 창의력이 많이 필요하지 않는 지루한 작업입니다.
이러한 이유로 Django는 모델에 대한 관리자 인터페이스 생성을 완전히 자동화합니다.
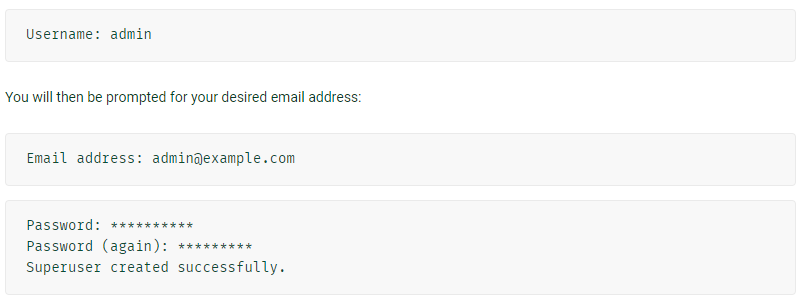
(1) Creating an admin user
> python manage.py createsuperuser
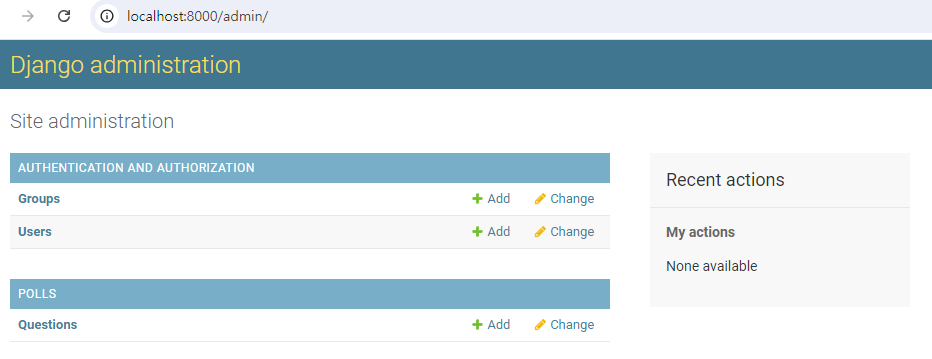
 (2) 관리자 로그인
> python manage.py runserver
http://127.0.0.1:8000/admin/
  (2) 관리자 로그인

    > python manage.py runserver

       http://127.0.0.1:8000/admin/


   polls에서 생성한 테이블이 보이질 않는다.

   polls/admin.py 에 다음과 같이 수정한다. polls 앱에서 추가한 모델을 등록한다.
polls에서 생성한 테이블이 보이질 않는다.
polls/admin.py 에 다음과 같이 수정한다. polls 앱에서 추가한 모델을 등록한다.
from django.contrib import admin
# Register your models here.
from .models import Question
from .models import Choice
admin.site.register(Question)
admin.site.register(Choice)
 5. Views 추가 작성하기
polls/views.py에 다음과 같이 추가한다. 이 함수는 계속 수정 변경하면서 사용될 예정이다.
  5. Views 추가 작성하기

   polls/views.py에 다음과 같이 추가한다.  이 함수는 계속 수정 변경하면서 사용될 예정이다.
def detail(request, question_id):
return HttpResponse("You're looking at question %s." % question_id)
def results(request, question_id):
response = "You're looking at the results of question %s."
return HttpResponse(response % question_id)
def vote(request, question_id):
return HttpResponse("You're voting on question %s." % question_id)
polls/urls.py에 다음과 같이 추가한다. router를 추가한다.
from django.urls import path
from . import views
urlpatterns = [
# ex: /polls/
path("", views.index, name="index"),
# ex: /polls/5/
path("<int:question_id>/", views.detail, name="detail"),
# ex: /polls/5/results/
path("<int:question_id>/results/", views.results, name="results"),
# ex: /polls/5/vote/
path("<int:question_id>/vote/", views.vote, name="vote"),
]
   다음과 같이 브라우저에서 테스트 해보자
        http://localhost:8000/polls/1/             <-- views.detail  호출
        http://localhost:8000/polls/1/vote         <-- views.vote    호출
        http://localhost:8000/polls/1/results/     <-- views.results 호출

   좀더 구체적으로 작성해 본다.

   polls/views.py를 다음과 같이 수정한다.
from .models import Question
def index(request):
latest_question_list = Question.objects.order_by("-pub_date")[:5]
output = ", ".join([q.question_text for q in latest_question_list])
return HttpResponse(output)
   http://localhost:8000/polls


 6.templates 사용하기


 위와 같은 방법으로 프로그램을 변경하면서 View를 작업하는  것은 매우 불편하다.

  polls아래에 templates 폴더를 만든다.   templates 폴더 아래에 polls폴더를 추가로 만든다.

 templates 폴더는 Django 애플리케이션에서 웹 페이지의 모양과 구조를 정의하는 HTML 파일을 저장하고,

 이를 통해 동적 웹 페이지를 생성하는 중요한 역할을 한다.

  polls/templates/polls/index.html 파일을 생성한다.


  polls/templates/polls/index.html

  <!DOCTYPE html><html><body></body></html>을 생략할 수 있으나 모두 입력하는 것이 좋다.

  추가로 BoothStrap이나 다른 자바스크립트 라이브러리와 같이 많이 쓴다.
{% if latest_question_list %}
<ul>
{% for question in latest_question_list %}
<li><a href="/polls/{{ question.id }}/">{{ question.question_text }}</a></li>
{% endfor %}
</ul>
{% else %}
<p>No polls are available.</p>
{% endif %}
polls/views.py를 다음과 같이 수정한다.
from django.shortcuts import render
from django.http import HttpResponse
from .models import Question
from django.template import loader
def index(request):
latest_question_list = Question.objects.order_by("-pub_date")[:5]
template = loader.get_template("polls/index.html")
context = {
"latest_question_list": latest_question_list,
}
return HttpResponse(template.render(context, request))
   일반적으로 django에서는 render 함수를 이용하여 결과를 return 하는 방식으로 프로그램을 작성하는 것이 관례이다.
   polls/views.py를 다음과 같이 수정한다.
from django.shortcuts import render
from django.http import HttpResponse
from .models import Question
from django.template import loader
def index(request):
latest_question_list = Question.objects.order_by("-pub_date")[:5]
context = {"latest_question_list": latest_question_list}
return render(request, "polls/index.html", context)
polls/views.py를 다음과 같이 수정한다. detail함수를 수정한다.
from django.shortcuts import render
from django.http import HttpResponse
from .models import Question
from django.template import loader
from django.http import Http404
def detail(request, question_id):
try:
question = Question.objects.get(pk=question_id)
except Question.DoesNotExist:
raise Http404("Question does not exist")
return render(request, "polls/detail.html", {"question": question})
polls/templates/polls/detail.html 을 다음과 같이 만든다.
<h1>{{ question.question_text }}</h1>
<ul>
{% for choice in question.choice_set.all %}
<li>{{ choice.choice_text }}</li>
{% endfor %}
</ul>
  views.py 파일의 detail함수를 수정한다. 에러처리를 좀 더 간결하게 할 수 있다. (try 문장을 사용하지 않아도 된다.)

   get_object_or_404() 함수를 사용하면 에러발생 시에도 404 에러를 보내줄 수 있다.
from django.http import HttpResponse
from .models import Question
from django.template import loader
from django.http import Http404
from django.shortcuts import get_object_or_404, render
def detail(request, question_id):
question = get_object_or_404(Question, pk=question_id)
return render(request, "polls/detail.html", {"question": question})
polls/urls.py 를 다음과 같이 수정한다.
from django.urls import path
from . import views
app_name = "polls"
urlpatterns = [
path("", views.index, name="index"),
path("<int:question_id>/", views.detail, name="detail"),
path("<int:question_id>/results/", views.results, name="results"),
path("<int:question_id>/vote/", views.vote, name="vote"),
]
7. 다음과 같이 detail.html을 수정한다.
이 코드는 사용자가 설문조사 질문에 대한 선택지를 선택하고 투표할 수 있는 Form(폼)을 생성한다.
각 선택은 라디오 버튼으로 표시되며, 사용자는 하나의 선택을 선택할 수 있다. 폼이 제출되면 데이터는 POST 방식으로 서버에 전송된다.
polls/template/polls/detail.html
<form action="{% url 'polls:vote' question.id %}" method="post">
{% csrf_token %}
<fieldset>
<legend><h1>{{ question.question_text }}</h1></legend>
{% if error_message %}<p><strong>{{ error_message }}</strong></p>{% endif %}
{% for choice in question.choice_set.all %}
<input type="radio" name="choice" id="choice{{ forloop.counter }}" value="{{ choice.id }}">
<label for="choice{{ forloop.counter }}">{{ choice.choice_text }}</label><br>
{% endfor %}
</fieldset>
<input type="submit" value="Vote">
</form>
polls/views.py
vote() 함수를 수정한다.
from django.template import loader
from django.http import Http404
from django.shortcuts import get_object_or_404, render
from django.db.models import F
from django.http import HttpResponse, HttpResponseRedirect
from django.urls import reverse
from .models import Choice, Question
def vote(request, question_id):
question = get_object_or_404(Question, pk=question_id)
try:
selected_choice = question.choice_set.get(pk=request.POST["choice"])
except (KeyError, Choice.DoesNotExist):
# Redisplay the question voting form.
return render(
request,
"polls/detail.html",
{
"question": question,
"error_message": "You didn't select a choice.",
},
)
else:
selected_choice.votes = F("votes") + 1
selected_choice.save()
# Always return an HttpResponseRedirect after successfully dealing
# with POST data. This prevents data from being posted twice if a
# user hits the Back button.
return HttpResponseRedirect(reverse("polls:results", args=(question.id,)))

8. 다음과 같이 results 부분을 수정한다.
polls/view.py
from django.template import loader
from django.http import Http404
from django.shortcuts import get_object_or_404, render
from django.db.models import F
from django.http import HttpResponse, HttpResponseRedirect
from django.urls import reverse
from .models import Choice, Question
def results(request, question_id):
question = get_object_or_404(Question, pk=question_id)
return render(request, "polls/results.html", {"question": question})
polls/template/polls/results.html 를 생성한다.
<h1>{{ question.question_text }}</h1>
<ul>
{% for choice in question.choice_set.all %}
<li>{{ choice.choice_text }} -- {{ choice.votes }} vote{{ choice.votes|pluralize }}</li>
{% endfor %}
</ul>
<a href="{% url 'polls:detail' question.id %}">Vote again?</a>
실행하고 테스트를 한다. 데이터 베이스에서 확인해 본다